Front Shock Replacement
Symptoms:
- The front end of your scooter is overly bouncy. You'd think you were on a Sears Allstate.
The repair described in this page applies to the A1 and A2 (and possibly others) front fork assembly. This is an easy, but important repair. Your shock absorber is probably not giving you a stable ride.
I bought new fork bellows and had been meaning to replace them when I replaced the shock absorber. My bellows were cracked and were no longer keeping my fork clean.
All parts are available from the Heinkel Club Deutschland.
Repair Time: 1.5 hours.
Tools Required:
- Flat head screw driver.
- 6mm allen wrench.
- 10mm, 11mm, 14mm, 17mm and 19mm open ended wrenches.
- 10mm, 11mm, 14mm and 19mm sockets.
Repair:

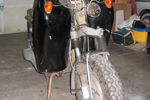
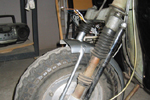

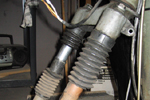
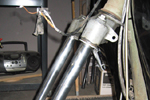
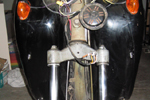

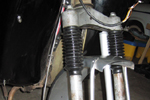

Hang the Tourist. As with many of my repairs, I like to "hang" the scooter from the rafters of my garage. This allows me to raise the front end of the scooter to enable easier removal of the front wheel.
Disconnect the headlamp. There are four wires that connect to the headlamp assembly. If you have short term memory issues (like me), write down the wire colors next to the corresponding post. Here is how it ought to be: brown is ground, grey is the running light, white and yellow are the two main beam wires.
Remove the front nose. There are six sets of bolts and nuts that hold this in place. Save the top two for last that way the nose won't fall on your head when you are underneath and removing the last bolt.
Remove the front wheel. The front wheel is held on by two 19mm nuts. Before you remove the wheel, disconnect the front brake cable.
Remove the front shock absorber. The shock absorber is held on by 14mm bolts on the top and bottom.
Remove the front fender. The fender is held on by four 10mm bolts, and two 14mm bolts. One of the 14mm bolts also held the bottom of the shock absorber.
Remove the fork ends. The fork ends are held on by a single 14mm bolt on the bottom of the fork. This bolt also serves as the fork oil drain plug. Once the bolt is removed, the fork end will slide off.
Clean the forks. Clean all sides and try to remove sludge from the inside of the fork ends.
Replace bellows. The bellows have a notched side. This side is the top. I find it easiest to mount the bellows to the forkends, and then slide the pair up and over the fork. Install the 14mm bolt to hold the fork end in place.
Refill forks with oil. The repair manual suggests using 30cc of SAE 30 oil. The oil filler plug is at the top of each fork. The plug is a 17mm bolt.
Fit front fender. No surprises here.
Fit front shock absorber. No surprises other than the fat side should be on top.
Fit front wheel. For whatever reason, I consider this job to be a pain. It is very simple, but I have difficulty aligning the slot on the RH side of the hub with the notch on the RH forkend. That, along with the fact that the axle has a flat side that must be aligned properly. Don't forget that the speedometer gear has two notches that must be aligned with the pegs on the LH side of the hub.
Fit front nose. Carefully feed the headlamp wires through the hole in the nose and then slide the nose into place. I usually use one of the 11mm screws to hold the nose in place. Then I start feeding the plastic beading into place.
Fit headlamp. Easy enough. Do you remember how the wires were connected?